
Building an AI Agent with Llama 4 and AutoGen
Meta’s Llama 4 family of models is currently ruling the ever-advancing world of AI. These models are revolutionizing how we build intelligent systems with their native multimodal capabilities. When Llama 4 combines with AutoGen, it unlocks the full potential of building dynamic, responsive, and robust AI Agents. By leveraging the integration between Llama 4 and AutoGen, developers can create innovative AI agents that can reason, collaborate, and adapt efficiently. In this article, we’ll learn how to build AI agents with Llama 4 and AutoGen for specific applications.
Why Should We Consider Using Llama 4?
The Llama 4 model family, including Scout and Maverick variants, represents a significant leap forward in open-source AI technology. These models offer several key advantages:
- Multimodal Intelligence: Llama 4 features native multimodal capabilities that integrate different types of input into a unified architecture. This enables more sophisticated reasoning across different media types.
- Large Context Length: It supports up to 10 million tokens, expanding on Llama 3‘s 128K limit. It enables handling exceptionally long contexts. This makes possible advanced applications like comprehensive multi-document analysis, extensive personalization based on user history, and navigation of large codebases.
- Efficient Performance: Llama 4 employs a Mixture of Expert architecture that activates only specific portions of the model for each token processed. This approach makes the models highly efficient. Llama 4 Maverick, for instance, uses just 17 billion of its total 400 billion parameters during operation. This allows it to run on a single H100 DGX host.
- Superior Performance and Capabilities: Benchmark testing shows Llama 4 Maverick outperforming comparable models like GPT-4o and Gemini 2.0 across coding, reasoning, multilingual capabilities, and image understanding.
- Open Source and Accessible: Meta is making models available for download. This encourages open innovation, enabling developers to customize and deploy the technology across diverse applications and platforms.
Also Read: DeepSeek V3 vs. Llama 4: Choosing the Right AI Model for You
Llama 4 Benchmark Performance
To understand just how good this model is, here’s a comparison of Llama 4 against other top models on various standard benchmarks.


Also Read: Llama 4 vs. GPT-4o: Which is Better for RAGs?
Building an AI Agent Using Llama 4
In this section, I will walk you through the process of building task-specific agents using Llama 4 and AutoGen. We will create a multi-agent system that analyzes client requirements for a job, finds freelancers for the particular job based on their experience and details, and then generates custom job proposals for the user to send out. So let’s begin.
Also Read: Hands-on Guide to Building Multi-Agent Chatbots with AutoGen
Step 0: Setting Up the Environment
Before building the agent, we will first cover the necessary prerequisites and set up the environment.
Prerequisites
Accessing the API
We will be using the Together API here to access the Llama 4 model. Create an account on Together AI and visit this page to create your secret key: https://api.together.xyz/

Step 1: Setting up Libraries and Tools to Guide the AI Agents
First, we will be importing all the necessary libraries and tools that we will need here.
import os
import autogen
from IPython.display import display, Markdown
Step 2: Calling the API
To use the Llama 4, we have to load the Together API. The code block below will help us load the APIs and configure them to the environment.
with open("together_ai_api.txt") as file:
   LLAMA_API_KEY = file.read().strip()
os.environ["LLAMA_API_KEY"] = LLAMA_API_KEY
Step 3: Creating Agents and Defining Tasks
Now, let’s create the required agents and define their tasks, i.e., what they will do.
1. Client Input Agent
The Client Input agent acts as the primary interface between the human user and the agent system. It collects project details like client requirements, timeline, and budget from the user and passes them to the Scope Architect. It also relays follow-up questions and answers, and signals termination when the final proposal is accepted.
Expected Output:
- Clear transmission of the user’s project description and freelancer profile (skills, experience, time estimate).
- Ends the session once a satisfactory proposal is delivered, or the user will explicitly end it.
# Agent 1: Handles Human Input for Client Requirements
client_agent = autogen.UserProxyAgent(
   name="Client_Input_Agent",
   human_input_mode="ALWAYS",  # asks the human for input
   max_consecutive_auto_reply=1, # Only reply once
   is_termination_msg=lambda x: x.get("content", "").rstrip().endswith("TERMINATE"),
   system_message="""You are the primary point of contact for the user.
   Your first task is to provide the initial project details received from the human user (client requirements, product details, timeline, budget) to the group chat.
   After the Scope Architect asks questions, relay the human user's answers about their skills, experience, tools, and time estimate back to the chat.
   Reply TERMINATE when the final proposal is generated and satisfactory, or if the user wishes to stop. Otherwise, relay the user's input.
   """,
)
2. Scope Architect Agent
The Scope Architect Agent is responsible for the initial project details from the Client Input Agent. After that, it asks specific questions to gather the freelancer’s skills, tools, past project experience, and estimated time to complete the work. It does not proceed to proposal generation itself but ensures that all the necessary context is collected before handing it over to the next agent.
Expected Output:
- Well-structured summary combining both the client’s project needs and the freelancer’s capabilities.
- Triggers the Rate Recommender Agent once all required data is collected and summarized.
# Agent 2: Gathers User's Profile and Estimates
scope_architect_agent = autogen.AssistantAgent(
   name="Scope_Architect",
   llm_config=llm_config,
   human_input_mode="ALWAYS",
   max_consecutive_auto_reply=1, # Only reply once
   is_termination_msg=lambda x: x.get("content", "").rstrip().endswith("TERMINATE"),
   system_message="""You are a Scope Architect. Your role is to understand the project requirements provided initially and then gather necessary details *from the Client_Input_Agent (representing the user/freelancer)*.
   1. Wait for the initial project details from Client_Input_Agent.
   2. Once you have the project details, formulate clear questions for the Client_Input_Agent to ask the human user about their:
       - Relevant past work/projects and collaborations.
       - Key skills and tools applicable to this project.
       - Their estimated time to complete the defined work.
   3. Do NOT proceed to proposal generation. Wait for the Client_Input_Agent to provide the user's answers.
   4. Once you have both the client requirements AND the user's details (skills, experience, time estimate), summarize this information clearly for the Rate Recommender. Signal that you have all necessary info.
   """,
)
3. Rate Recommender Agent
The Rate Recommender Agent uses the collected information to generate a detailed project proposal. It waits for the complete summary from the Scope Architect. Then analyzes the project scope and freelancer details to generate a professional proposal document. This includes a custom introduction, a timeline, multiple pricing tiers, and a clear call to action.
Expected Output:
- Professionally formatted project proposal document with a scope, pricing, and next steps.
- The final output is ready to be delivered to the client for approval or further discussion.
rate_recommender_agent = autogen.AssistantAgent(
   name="Rate_Recommender",
   llm_config=llm_config,
   max_consecutive_auto_reply=1, # Only reply once
   system_message=f"""
You are a Proposal Generator and Rate Recommender. Your task is to create a structured project proposal.
Wait until the Scope_Architect shares a summary containing BOTH the client's project requirements AND the user's profile (skills, experience, time estimate, past work if available).
Analyze all received data: client needs, user expertise, estimated time, and any prior rate insights.
Generate a well-structured proposal addressed to the client, including the following sections:
Custom Introduction: Professionally introduce the user's services and reference the client's company and project.
Project Scope & Timeline: Clearly outline the deliverables with estimated timelines based on user input.
Suggested Pricing Tiers: Provide 1–3 pricing options (hourly, fixed fee, retainer) with justifications based on scope, user experience, or complexity.
Next Steps (CTA): Recommend scheduling a brief kickoff call to finalize and clarify details.
Present ONLY the final formatted proposal. Do not include additional commentary unless clarification is requested.""",)
4. User Proxy Agent
This agent acts as an entry point or helper to kick off the interaction. Though it doesn’t play a central role in this flow (based on the code provided), it could be used to initiate or assist with user-facing tasks.
user_proxy = autogen.UserProxyAgent(
   name="user_proxy",
   max_consecutive_auto_reply=1,
   # is_termination_msg=lambda x: x.get("content", "").rstrip().endswith("TERMINATE"),
   llm_config=llm_config,
   system_message="""you are an helpful assistant and initate the conversation"""
)
Step 4: Creating the Group Manager
This step sets up the central coordinator that manages communication and teamwork between all specialized agents.
1. Setting Up Group Chat
The Group Chat establishes a structured conversation environment for three specialized agents. These are the client agent, scope architect agent, and rate recommender agent. It manages conversation flow through round limits and orderly speaker selection.
Key points:
- Houses three specialized agents working toward proposal creation
- Four rounds maximum to maintain focus
- “Round_robin” speaking pattern ensures orderly participation
- Creates a controlled environment for gathering information
# --- Group Chat Setup ---
groupchat = autogen.GroupChat(
   agents=[client_agent, scope_architect_agent, rate_recommender_agent],
   messages=[],
   max_round=4,
   speaker_selection_method="round_robin",
)
2. Creating the Group Chat Manager
The Group Chat Manager orchestrates the entire conversation, guiding interactions through a logical progression from project details to proposal generation. Its system message provides step-by-step instructions for agent interactions and defines clear termination conditions.
Key points:
- Directs conversation flow between all agents
- Links to the Group Chat object
- Maintains consistent LLM configuration
- Contains detailed process instructions
- Terminates upon proposal completion or with the TERMINATE command
manager = autogen.GroupChatManager(
   groupchat=groupchat,
   llm_config=llm_config,
   # System message for the manager guiding the overall flow
   system_message="""Manage the conversation flow between the agents.
   1. Start with the Client_Input_Agent providing project details.
   2. Ensure the Scope_Architect asks the necessary questions about the user's background.
   3. Ensure the Client_Input_Agent relays the user's answers.
   4. Ensure the Rate_Recommender waits for all info before generating the final proposal in the specified format.
   The conversation finishes when the final proposal is generated or the Client_Input_Agent says TERMINATE."""
)
Step 5: Initiating the Chat
Now that we have the agents in place, let’s initiate the collaborative workflow between the agents. For this, we will send a clear instruction prompt to the GroupChatManager from the user_proxy agent.
Key points:
- Triggers the conversation by using user_proxy.initiate_chat(), which starts the group chat and sends the message to the GroupChatManager.
- Delegates control to the manager, which then follows the step-by-step flow using the round-robin method and its internal system message instructions to coordinate the agents.
# --- Initiate Chat ---


print("Starting the proposal generation process...")
print("Please provide the initial client and project details when prompted.")


initial_prompt_message = """
Start the process. First, I need the client/project details from the user (via Client_Input_Agent).
Then, Scope_Architect should ask the user (via Client_Input_Agent) about their background.
Finally, Rate_Recommender should generate the proposal.
"""


user_proxy.initiate_chat(
   manager,
   message=initial_prompt_message
)
Step 6: Formatting the Output
This code will help us present the output in a markdown(.md) format.
chat_history = manager.chat_messages[client_agent] # Or potentially just manager.chat_messages if structure differs slightly


# Find the last message from the Rate_Recommender agent
final_proposal_message = None
for msg in reversed(chat_history):
   if msg.get("role") == "assistant" and msg.get("name") == rate_recommender_agent.name:
        if "Custom Introduction:" in msg.get("content", ""):
           final_proposal_message = msg
           break
if final_proposal_message:
   final_proposal_string = final_proposal_message.get("content", "Proposal content not found.")
   try:
       display(Markdown(final_proposal_string))
   except NameError:
       print("\n(Displaying raw Markdown text as rich output is unavailable)\n")
       print(final_proposal_string)


else:
   print("\nCould not automatically extract the final proposal from the chat history.")
   print("You may need to review the full chat history above.")
Sample Output
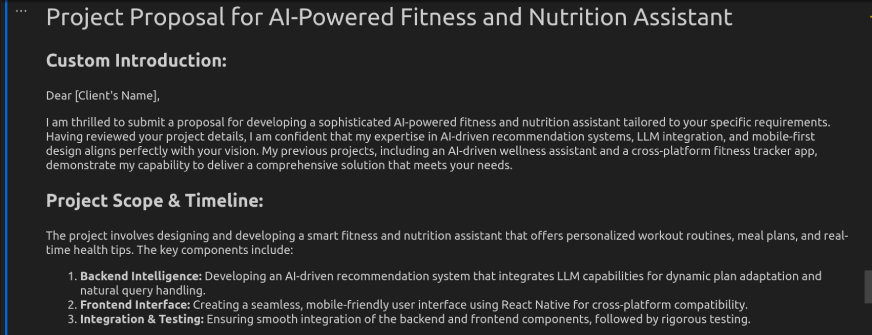

Conclusion
In this article, we built a project proposal agent using Llama 4 and AutoGen. The agent effectively gathered client requirements, structured the proposal, and delivered a professional document with clear pricing and timeline breakdowns. AutoGen handled the conversation flow, while Llama 4 ensured natural, context-aware responses throughout. This collaboration simplified client communication, offering a streamlined solution for freelancers and consultants to automate proposal generation with minimal manual input.
Llama 4 enhanced the agent’s performance with its improved instruction following, better context retention, and efficient few-shot learning. Its ability to maintain coherence across multi-turn dialogues made the proposal generation process more intelligent and responsive. Additionally, the model’s fast inference and low cost made it suitable for real-time applications. Together, Llama 4 and AutoGen enable powerful agent workflows that boost productivity and professionalism in client-facing tasks.
Frequently Asked Questions
Q1. What is Llama 4, and why is it used in this project?
A. Llama 4 is a cutting-edge language model known for its efficiency, accuracy, and strong performance in reasoning and multi-turn dialogue generation.
Q2. What is AutoGen, and how does it help?
A. AutoGen is a framework that simplifies building multi-agent workflows. It manages interactions and task coordination between different AI agents.
Q3. Can this agent be customized for different project domains?
A. Yes, the architecture is modular. You can adapt it for domains like healthcare, e-commerce, finance, or software development.
Q4. Is Llama 4 suitable for real-time use cases?
A. Absolutely. Llama 4 offers low-latency responses and can handle complex prompts, making it great for interactive or real-time applications.
Q5. Do I need advanced coding skills to implement this?
A. Not necessarily. With basic Python knowledge and understanding of LLMs, you can set up and run similar agent workflows.
Login to continue reading and enjoy expert-curated content.